

ROLE
UX Research
+ Physical Prototype
TEAM
04 Designers
METHODS
User Research
+ Figma Design
DELIVERABLE
Mobile
Prototype
CONCEPT
Our project was inspired by the UN Sustainable Development Goal aimed at improving health and well-being. Research shows that prolonged computer use frequently results in digital eye strain and musculoskeletal discomfort—such as neck stiffness, headaches, and back pain—often caused by poor ergonomics and improper screen distance (Reddy et al., 2013). To address these issues, we developed a prototype of a low-profile, clip-on webcam that detects a user’s proximity to their laptop and triggers an on-screen alert when they sit too close.
Recognizing that clip-on devices can feel distracting or unconventional, we designed both the physical form and digital interface to be as unobtrusive as possible. With a three-person team, we employed four distinct prototyping methods, each chosen to gather targeted feedback on different aspects of the product and ensure a well-rounded evaluation of the concept.

Initial Concept Sketches for Aline Webcam
GOALS
PROTOTYPING TECHNIQUES
We used four prototyping techniques: cardboard prototyping, 3D printing, behavioral testing, and video prototyping. We chose these methods because they complemented one another and built progressively toward a more refined and realistic user experience.
CARDBOARD PROTOTYPING
The cardboard prototype served as a quick, iterative way to test the overall size and shape of the webcam before moving into 3D modeling. It allowed us to translate the dimensions from our conceptual sketches into a tangible form.
3D MODELING
Since the webcam was central to our behavioral prototype, we wanted full autonomy in designing and creating our own physical prototype to gather meaningful physical design feedback.
BEHAVIORAL PROTOTYPING
The behavioral prototype enabled us to observe user interactions and assess the device’s desirability if fully developed. By using the “Wizard of Oz” technique, we could gather valuable feedback on both design and functionality when executed effectively. Using this feedback, we could make potential adjustments to our physical webcam and virtual overlays before we design our video prototype.
VIDEO PROTOTYPING
The video prototype provides contextual insight by showcasing the prototype in action. In a two-minute demonstration, it introduces the problem space and illustrates how the prototype addresses it, highlighting the user’s interaction and response to its functionality. We intended to gather feedback on the prototype’s desirability and perceived impact by observing users’ reactions, comments, and interpretations during and after they watched the video.
APPLICATION
The proximity-sensing webcam detects how close the user is to their laptop screen and displays an alert overlay on their current page when they are sitting too close. Because building the full sensing technology was beyond the scope of the course, we developed the prototype in low fidelity and focused on simulating key interactions to assess usability and potential impact. The on-screen alert was created using BetterTouchTool, which allowed us to trigger a custom overlay through a specific key combination.
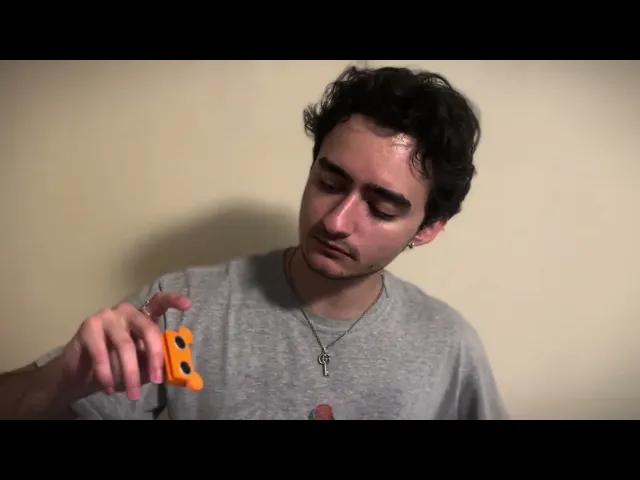
For the “Wizard of Oz” user test, we paired this setup with a Bluetooth keyboard and a designated keybind to realistically mimic the proximity-based behavior. To enhance the perceived functionality of the device, the physical webcam included a 3D-printed housing attached to an active Arduino board, which served purely as a visual and tactile representation of the final product.
EVALUATION
BEHAVIORAL TESTING (WIZARD OF OZ) Q&A
We evaluated the prototype through both user observation and semi-structured interviews. In the testing phase, three participants interacted with the system during a short work session. To evaluate both iterations of the physical webcam, we conducted three tests: the first with both models attached to the screen, the second with one version, and the third with the other.
We created a document with a series of Latin texts, with font sizes ranging from 5 through 13, and asked users to identify and highlight the only letter ‘Z’ in each passage in under 90 seconds. This task encouraged users to lean in and ‘trigger’ the alert, which was actually manually controlled by a hidden bluetooth keyboard across the table. Once the user was finished, we asked a series of questions to further observe changes in posture, response time, and qualitative feedback.
EVALUATION QUESTIONS
(1=poor, 7=excellent) Would you rate your overall first impression of the model’s look and quality on the laptop?
When the alert appeared on screen, did you immediately understand what it meant?
How easy or difficult was it for you to complete this task without thinking about the webcam?
(1=poor, 7=excellent) How would you rate the clarity of the alert?
Did the webcam’s size or position interfere with your use of the laptop in any way?
Would you feel comfortable leaving this model attached to your laptop for long periods of time?
Do you believe this alert system could improve your posture or reduce strain over time? Why or why not?
Can you recall a time during this test where the alert genuinely changed your sitting position?
(1= not valuable, 7=extremely valuable) How valuable would this feature be in your daily workflow or study routine?
Our overall takeaways from the Wizard of Oz tests were strong desirability and impact. Our behavioral prototyping helped elicit genuine feedback as if the prototype were fully functional. Users unanimously affirmed that it fulfilled its intended purpose and expressed interest in using it in their daily routines.
User feedback showed that the alert system successfully influenced behavior, with several participants noting that the visual cues—especially the orange and red warnings—prompted them to hold their distance, avoid leaning closer, and remain aware of their posture. Many described the system as simple but effective, giving it moderate value ratings (mostly 5–6 out of 10) and acknowledging that it “would probably help my posture a bunch.” Some users noted limitations, such as the alert being hard to notice when already too close or concerns that they might get used to it over time.
Perceptions of quality varied, with participants rating the prototype around 4–6, recognizing its low-fidelity nature but still understanding the intended function. Overall, users found the concept convincing, and their surprised reactions during the reveal—expressing shock or amusement that the system was manually triggered—reinforced how realistic the prototype felt in practice.
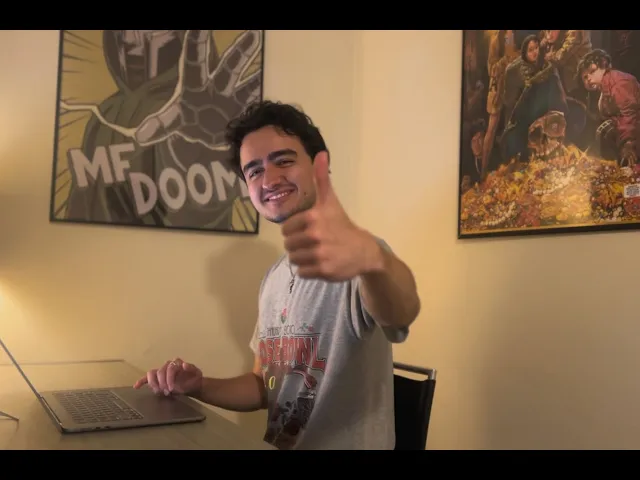
VIDEO PROTOTYPE
Based on user responses on desirability and impact, we made adjustments to the webcam’s design and refined the on-screen alerts to improve clarity and responsiveness. Several individuals who viewed the video prototype noted that the cinematography was well executed and helped convey the product’s intended tone. The webcam’s visual design was also positively received, with users describing it as clean and appealing. Overall, viewers felt that the video effectively captured the core purpose of the prototype and demonstrated its potential to positively influence user posture in an engaging and relatable way.
ANALYSIS
Overall, our prototypes successfully captured the essence of the product, allowing us to conduct meaningful testing and gather valuable feedback at every stage of the prototyping process. Our class held an in-class critique on Thursday, June 5th, where each team viewed one another’s demo videos and provided quick feedback on how well the prototypes addressed their design goals. The majority of our feedback was overwhelmingly positive, with users affirming the clarity, purpose, and effectiveness of our prototype
STRENGTHS
The behavioral user test was well executed and we got valuable feedback from users that we applied to our video prototype
The video prototype effectively demonstrated the product in action, presenting it in a clear and organized manner while highlighting the potential impact a solution like this could have.
Our physical 3D print prototype looked realistic and did a great job of seeting up our behavioral prototype
IMPROVEMENTS
Some users mentioned that the sensors on the webcam can be intimidating for some people
Implementing technical parts that would make it functional
We could have found more use for the cardboard prototype, since it merely served as a point of reference for the purposes of this project
Looking ahead, our team is motivated to further develop this prototype into a fully functional product. We believe the problem space remains relevant and will continue to be. Our next steps include conducting competitive analysis and leveraging the feedback gathered throughout this prototyping process to create a solution that is both unique and desirable.
Process Video Demonstration
EMBEDED SYSTEMS
To expand the scope of the project, I created a new iteration of the product that fully integrates both the hardware and the supporting firmware, allowing the webcam to function as a self-contained device capable of sensing user proximity and triggering posture-related feedback without relying on external simulation tools.
HARDWARE

AdaFruit SAMD21 Dev Board

AdaFruit VL53L4CD toF Sensor
This version uses two primary components: a development board and a time-of-flight (ToF) distance sensor. I selected the development board because it offered a compact form factor, accessible GPIO pins, and reliable processing capabilities suitable for rapid prototyping. The ToF sensor was chosen for its high-precision proximity detection, low latency, and small footprint, making it ideal for accurately measuring how close a user is to their laptop screen.
FIRMWARE
CircuitPython
The QT Py reads distance values from the VL53L4CD ToF sensor and prints one of three textual states (SAFE, MID, CLOSE) to the serial port. The BTT Python bridge listens to these messages in real time.

Python Serial Bridge
This script continuously reads the QT Py’s serial output. When the distance category changes, it fires a corresponding BetterTouchTool Named Trigger. These triggers activate the color-coded HUD overlays.

BTT Keyboard Shortcut
To give the system an easy on/off switch, a BTT keyboard shortcut (Command + Shift + F) runs this shell script. If the serial bridge is running, it stops it. If it is not running, it launches a fresh background instance.

SOFTWARE
BetterTouchTool played an essential role by enabling custom trigger states that responded to different user distances. I created three triggers—distanceClose, distanceMid, and distanceSafe—each linked to a corresponding on-screen overlay nested within the trigger itself. This setup allowed the interface to update dynamically, displaying red, yellow, or green feedback based on proximity. By assigning these overlays directly to the trigger logic, BetterTouchTool provided an efficient way to simulate real-time posture alerts without building a dedicated application.
SCHEMATIC & CALCULATIONS
CONNECTIONS
The QT Py M0 and VL53L4CD are connected over I²C using a STEMMA QT cable.
QT Py GND → VL53L4CD GND
QT Py SDA → VL53L4CD SDA
QT Py SCL → VL53L4CD SCL
QT Py 3V → VL53L4CD VIN

DISTANCE THRESHOLD CALCULATIONS
Placeholder values were chosen based on common ergonomic guidelines:
SAFE: > 50 mm (Healthy Viewing Distance
MID: 30 - 50 mm
CLOSE: < 30 mm (Too Close, Increased Eye Strain Risk)
The VL53L4CD has a precision of ±1 mm and ranges up to ~1200 mm indoors, making it suitable for detecting real-time user movement. The polling frequency (20 Hz) is fast enough for smooth overlay updates without noticeable lag.
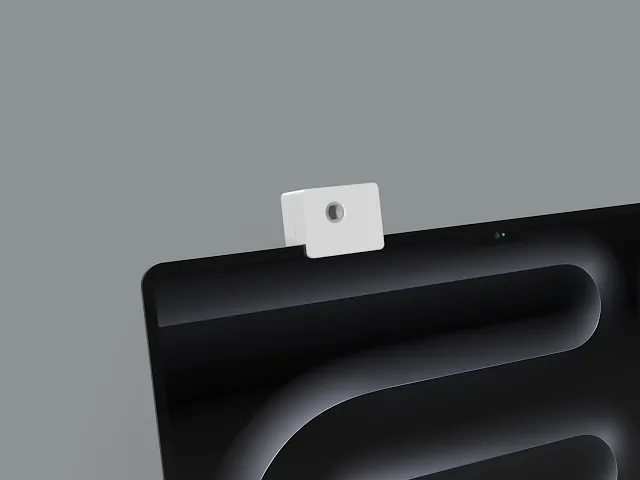
3D PRINT ENCLOSURE DESIGN
FORM FACTOR


The enclosure was designed to be compact, minimal, and visually unobtrusive so that it could sit naturally on the top edge of a laptop screen. Rounded edges and a clean silhouette help reduce visual distraction, aligning the physical design with the product’s goal of supporting healthier computing habits without adding clutter. The form factor was intentionally kept small to maintain users’ comfort and avoid the bulkiness often associated with clip-on peripherals.
FUNCTIONAL INTEGRATION OF COMPONENTS
The housing was modeled to securely fit both the development board and the ToF sensor, ensuring proper sensor exposure and cable routing while keeping all electronics organized and protected. Internal supports and snap-fit features were added to hold components in place, optimizing airflow and maintaining accurate distance sensing. This structural layout ensured that the enclosure not only looked refined but also supported reliable hardware performance.
USER INTERACTION & MODULARITY
Because users may need to access the internal electronics—for resetting the microcontroller or adjusting wiring—the enclosure was designed with modularity in mind. The two-part shell allows components to be easily removed, serviced, or upgraded without compromising the overall fit on the laptop. This modular approach also supports iterative prototyping, enabling quick adjustments to spacing, tolerances, or sensor alignment as the design evolves.